How DIP Switches Work
A DIP switch (Dual Inline Package switch) is a manual electric switch used to control the flow of electricity within a specific circuit on a printed circuit board (PCB). Unlike standard buttons used for momentary actions, DIP switches work by holding a steady ON or OFF state to configure device settings, such as assigning a unique address to a remote control or setting the frequency of a garage door opener.
Physically, a DIP switch is actually a group of separate switches packaged together in a small box. Each individual switch in the row acts as a bridge. When you flip a switch to the "ON" position, it physically connects two contacts, completing the circuit and sending a signal (usually interpreted as a binary "1"). When flipped to "OFF," it breaks the connection (interpreted as a binary "0"). This allows hardware engineers to "hard-code" settings directly onto the motherboard without requiring software.
Alt Text: Close-up of an 8-position red DIP switch mounted on a circuit board showing numbers 1 through 8.
What is a DIP Switch?
A DIP switch is a set of tiny toggle switches built into a dual inline package (DIP). The term "Dual Inline" refers to the two parallel rows of connecting pins underneath the switch that plug into or are soldered onto a circuit board.
These components are crucial for configuration. While your computer keyboard uses switches to type characters, a DIP switch is used to tell a device how to behave. Because they are small and intended to be set only occasionally (semi-permanent), they are often adjusted using the tip of a pen or a small tool.
There are different mounting styles available. While traditional versions use through-hole technology (pins go through the board), modern electronics often utilize surface mount technology.
- Learn more here: What is an SMD DIP Switch
The Anatomy of the Switch
Inside the plastic housing, the mechanism is simple yet precise:
- The Actuator: The small plastic slider or rocker you move with your finger or tool.
- The Contacts: Gold or silver-plated metal strips inside the housing.
- The Detent: A mechanism that ensures the switch "clicks" firmly into the ON or OFF position, preventing it from floating in the middle.
How Do You Read a DIP Switch?
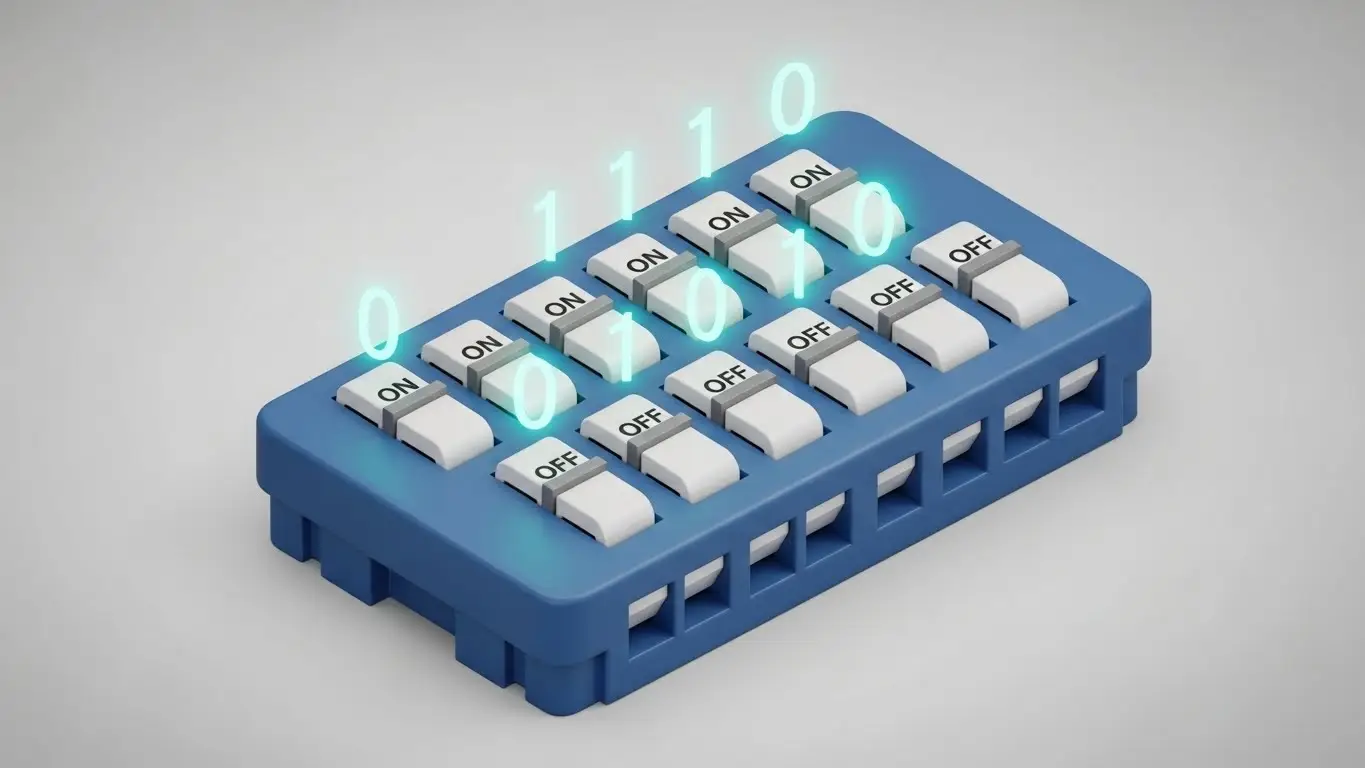
DIP switches are read using binary logic.
Because computers and microcontrollers "speak" in binary (1s and 0s), DIP switches provide a perfect physical interface for this language.
- ON (Closed Circuit): Usually represents the binary number 1.
- OFF (Open Circuit): Usually represents the binary number 0.
By combining multiple switches in a row (commonly 4, 8, or 10 switches), you can create complex codes. For example, an 8-position DIP switch allows for 256 different distinct combinations ($2^8$), allowing a single component to manage 256 different frequency channels or device addresses.
What are DIP Switches Used For?
DIP switches serve as the "setup menu" for hardware that doesn't have a screen.
Common applications include:
- Garage Door Openers: Syncing the remote frequency to the motor unit.
- Arcade Machines: Setting difficulty levels or coin-per-play costs.
- PC Motherboards: Configuring CPU clock speeds or voltage.
- Industrial Controls: Setting unique IDs for sensors on a network.
While DIP switches handle configuration, other switches handle user interaction. If you need a switch for a user to press repeatedly (like a reset button or a keyboard key), you would typically use a tactile switch.
- Comparison: What is Low Profile Tact Switch (Best for space-saving user interfaces).
What is the Difference Between a DIP Switch and a Tact Switch?

A DIP switch is for configuration, while a tact switch is for operation.
DIP switches are "latching," meaning they stay in the position you leave them in. Tactile (tact) switches are "momentary," meaning they only complete the circuit while you are physically pressing them.
If your device needs to withstand harsh environments, the type of switch you choose matters significantly. While many DIP switches are internal and protected by the device casing, external interface switches need robust sealing.
- Read more: Sealed Tact Switches Guide for understanding protection ratings.
| Feature | DIP Switch | Tactile Switch |
| Action | Latching (Stays put) | Momentary (Springs back) |
| Primary Use | Device Settings/Configuration | User Input/Interface |
| Current Handling | Very Low (Logic level) | Low to Medium |
| Durability | ~2,000 cycles | ~100,000+ cycles |
Types of DIP Switches
Not all DIP switches look the same. The internal mechanism changes based on the application.
1. Slide DIP Switches
The most common type. You slide a plastic nub up or down. They clearly display the ON/OFF status visually.
2. Rocker DIP Switches
Similar to a slide, but the actuator rocks like a see-saw. These are often easier to actuate with a finger but can be harder to visually read at a glance.
3. Rotary DIP Switches
These look like dials. Instead of sliding a lever, you turn a dial to a specific number (0-9 or 0-F for hexadecimal). The internal mechanism converts that rotary position into a binary output automatically.
Durability and Environment
Standard DIP switches are not always waterproof. If your PCB design requires components that can withstand moisture during the manufacturing wash process or in the field, you must look for sealed versions.
- Deep Dive: Waterproof Tactile Switches Explained (Principles of sealing apply to high-quality DIPs as well).
Other PCB Switching Components
DIP switches are rarely the only component on a board. In modern electronics, they work alongside various other input methods.
For example, while the DIP switch sets the "mode" of a gaming mouse, an Illuminated Tact Switch might be used for the DPI button to give the user visual feedback via LED.
Frequently Asked Questions
Generally, yes. In most standard logic circuits, completing the circuit (ON) pulls the voltage to a designated level interpreted as "1" or "High." However, some circuits use "active low" logic where ON is interpreted as 0. Always check the device manual.
It is not recommended. Changing settings while a device is running can cause unpredictable behavior or short circuits. Always power down the device before changing DIP switch positions, then power it back on so the device can read the new configuration during boot-up.
DIP switches have a lower cycle life than push buttons, typically rated for 1,000 to 3,000 cycles. They are designed to be set once and left alone, rather than used frequently like a keyboard key.
A dedicated DIP switch tool is best, but a small flathead screwdriver, a plastic stylus, or the tip of a ballpoint pen works well. Avoid using graphite pencils, as graphite dust is conductive and can cause short circuits.
Key Takeaways
- Function: DIP switches allow manual configuration of electronic circuits without software.
- Mechanism: They use a simple mechanical contact to create a binary (ON/OFF) signal.
- Usage: Best for "set and forget" settings like addresses, frequencies, and modes.
- Identification: They are easily recognized by their blocky housing and row of small numbered levers.
Conclusion
Understanding how DIP switches work is essential for anyone involved in electronics hardware, from PCB design to arcade machine maintenance. These reliable components provide a physical bridge between human intent and digital logic.
If you are designing a PCB and need reliable switching solutions—whether for configuration or user interface—choosing the right component is critical.
Explore our full range of switching solutions at HX-Switch