Tact Switch 4 Pin: A Complete Guide for Makers and Engineers
In the world of electronics, small components often make a huge difference — and tactile switches, or tact switches, are no exception. These compact, mechanical switches are ubiquitous in consumer electronics, DIY projects, industrial controls, and more. One of the most common configurations is the Tact Switch 4 Pin. In this post, we'll delve into what it is, how it works, and why it's essential in modern electronics.
What Is a Tact Switch?
A tactile switch is a momentary switch that closes a circuit when pressed and opens it when released. Known for their distinct "click" or tactile feedback, these switches provide physical confirmation that the circuit has been engaged.
Unlike latching switches (which stay in an on or off state), tact switches are designed for brief, purposeful interactions — such as turning on a device, adjusting a setting, or initiating a reset.
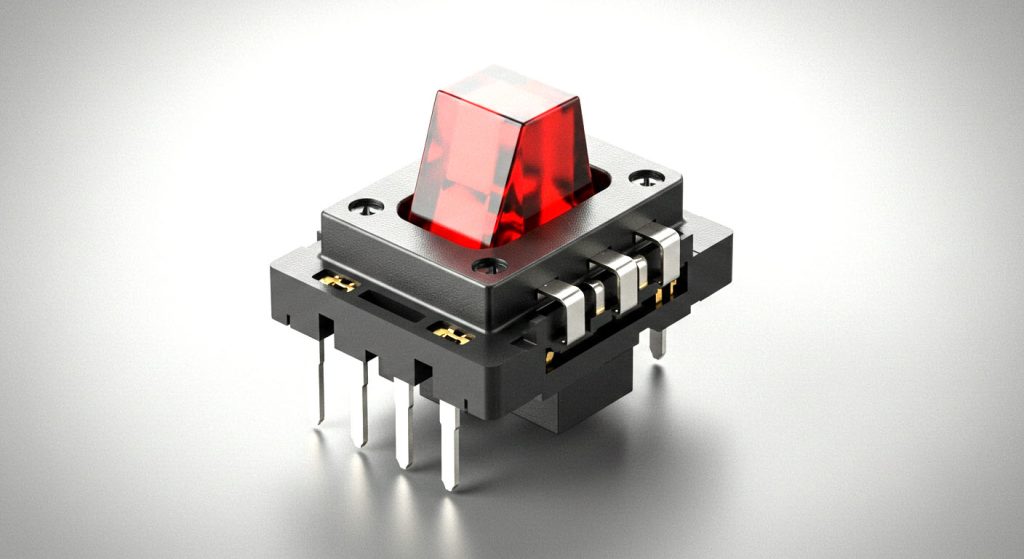
Why the 4 Pin Configuration?
The 4-pin tact switch is one of the most common types. Despite having four pins, it typically functions as a single-pole, single-throw (SPST) switch. The pins are usually arranged in pairs internally:
- Pin 1 and Pin 2 are connected.
- Pin 3 and Pin 4 are connected.
When the button is not pressed, these two pairs are disconnected from each other. Pressing the button completes the connection between both sides, allowing current to pass through.
This redundancy makes the switch mechanically stable and more reliable when soldered onto a PCB.
Internal Structure and Working Principle
Inside the switch, a small metal dome sits between the two contact pairs. When the button is pressed:
- The dome collapses, bridging the contacts.
- Current flows through the closed circuit.
- Releasing the button returns the dome to its original state, opening the circuit.
This action produces the familiar "click" and tactile sensation, signaling a successful press.
Key Features
The popularity of the 4-pin tact switch is no accident. Here are some defining features:
- Compact Size: Typically available in sizes as small as 6x6 mm.
- Low Profile: Ideal for tight PCB designs.
- Tactile Feedback: Improves user experience.
- Durability: Rated for thousands of presses.
- Simple to Use: Requires no special components to function.
- Wide Voltage Range: Works with both 3.3V and 5V logic systems.
- Affordable: Costs just a few cents in bulk.
Common Applications
These switches are found in almost every device that has physical buttons. Some examples include:
- Consumer Electronics: Remote controls, calculators, alarm clocks.
- Embedded Systems: Arduino and Raspberry Pi projects.
- Appliances: Microwaves, washing machines, air conditioners.
- Automotive: Dashboard controls and infotainment systems.
- Medical Devices: Portable health monitors.
- Gaming: Arcade buttons and controller D-pads.
They are ideal for applications that require short, user-initiated electrical signals.
How to Connect a 4 Pin Tact Switch
Wiring a tact switch is straightforward:
- Identify the pin pairs using a multimeter (or by checking the datasheet).
- Connect one side (say, Pins 1 and 2) to your microcontroller input.
- Connect the opposite side (Pins 3 and 4) to ground (GND).
- Add a pull-up resistor (if not already enabled internally).
Sample Circuit
If you're using an Arduino:-up resistor causes the pin to be HIGH when the button is not pressed.
Tips for Choosing the Right Tact Switch
When selecting a 4-pin tact switch for your project, consider the following:
1. Size and Mounting Type
- Through-hole: Easier for prototyping and soldering by hand.
- Surface-mount (SMD): Better for automated production.
2. Actuation Force
- Measured in grams (e.g., 160g, 260g, 320g).
- Higher force provides a firmer feel; lower force allows lighter touches.
3. Height and Travel Distance
- Affects how deep the button can be pressed.
- Choose according to the enclosure or user experience you want.
4. Durability
- Rated in cycles (e.g., 100,000 to 1,000,000 presses).
- Industrial applications may require higher ratings.
5. IP Rating
- If your device is exposed to moisture or dust, look for a sealed tact switch with an IP rating (e.g., IP67).
Debouncing: A Common Challenge
Tact switches can cause "bouncing" — a rapid on-off signal due to mechanical vibration when pressed. This can lead to erratic behavior in digital circuits.
Solutions:
- Hardware: Use a low-pass filter with a resistor and capacitor.
- Software: Add a short delay (e.g., 20ms) after detecting a press before reading again.
Troubleshooting Tips
If your tact switch isn't working, check the following:
- Orientation: Ensure correct alignment on the PCB.
- Cold Solder Joints: Reflow any suspicious connections.
- Multimeter Test: Check continuity across pins when pressed.
- Code Logic: Ensure you're interpreting LOW/HIGH states correctly.
Alternatives and Advanced Options
While 4-pin tact switches are versatile, some alternatives might be worth considering depending on your needs:
- 3-Pin Tact Switches: Fewer pins, same functionality in a smaller form.
- Dome Switches: Used in membrane keyboards.
- Capacitive Touch: No moving parts, ideal for waterproof designs.
- Rotary Encoders: For turning inputs rather than discrete presses.
Conclusion
The Tact Switch 4 Pin is a tiny yet powerful component that plays a crucial role in electronics — from hobbyist projects to industrial-grade devices. Its simplicity, tactile feedback, and reliability make it a go-to solution for countless applications.
Whether you’re building a prototype, designing a consumer product, or just tinkering for fun, understanding how to select and integrate a tact switch will add a professional edge to your work. And best of all, it’s a great entry point for learning more about how human interaction meets electronic logic.