How to Install a Tact Switch on PCB
To install a tact switch on a PCB, you must first identify the correct pin orientation, as most 4-pin switches are internally connected in pairs. Insert the switch legs into the through-holes (or align them with pads for SMT), ensuring the component sits flush against the board. Secure the switch by bending a leg or using tape, then solder the pins diagonally to prevent movement. Finally, inspect the joint for a shiny, cone-shaped finish and test the connection with a multimeter to ensure functionality.
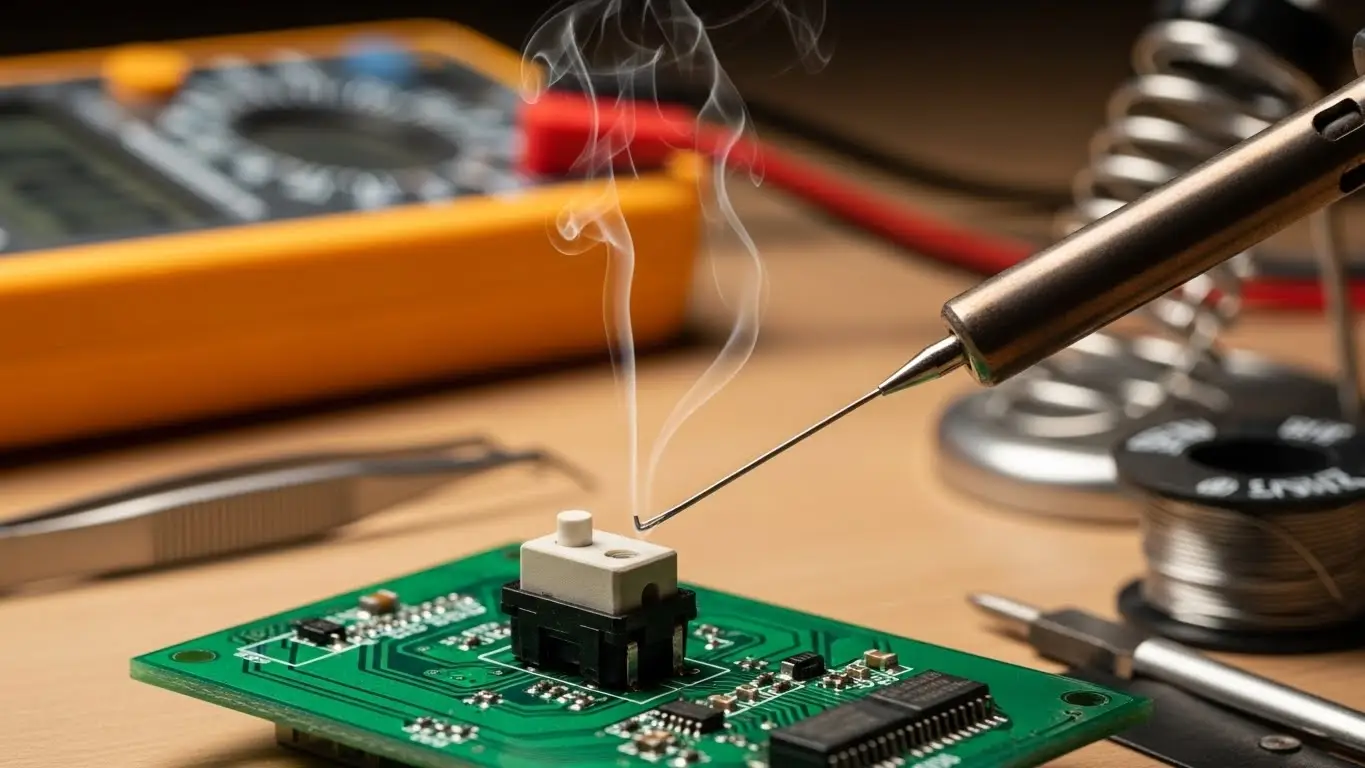
Essential Tools for Switch Installation
Before heating up your iron, ensure you have the right equipment. Installing a tactile switch requires precision because the plastic housing can easily melt if exposed to excessive heat.
- Soldering Iron: A temperature-controlled iron (set to approx. 350°C) is ideal.
- Solder Wire: Lead-free rosin core solder (0.8mm diameter or thinner) works best for small pads.
- Flux: A flux pen or paste helps solder flow evenly and prevents bridging.
- Tweezers: Essential for holding small SMT switches in place.
- Isopropanol (IPA): For cleaning sticky flux residues after installation.
[H2] Understanding Tact Switch Polarity and Pinout
"Which way does this go in?" is the most common question beginners ask.
Most standard 6x6mm tactile switches have 4 pins, but they are not all independent. Internally, pins 1 and 2 are connected, and pins 3 and 4 are connected. The switch action connects the two pairs.
- Visual Check: Look at the bottom of the switch. You will often see a molded track connecting the legs.
- Multimeter Check: If you are unsure, set your multimeter to continuity mode. Touch two pins without pressing the button. If it beeps, they are permanently connected. If it only beeps when pressed, that is the switching path.
[H2] Step-by-Step Installation: Through-Hole (THT)
Through-hole switches are mechanically stronger, making them ideal for devices that will be pressed forcefully.
1. Preparation and Placement
Clean the PCB pads with IPA. Insert the switch legs into the holes. If the legs are kinked (designed to snap-in), it should hold itself. If not, use a piece of tape or bend two opposite legs slightly outward to keep it from falling out when you flip the board.
2. Soldering the First Pin
Flip the board. Apply a small amount of flux to one pad. Touch the soldering iron tip to the pad and the component leg simultaneously for 1-2 seconds, then feed a small amount of solder. Remove the solder, then the iron.
3. Check Alignment
Before soldering the remaining pins, flip the board back over. Is the switch flush? Is it crooked? Since you only soldered one leg, you can easily reheat it and adjust the position now.
4. Finish and Trim
Solder the remaining legs in a diagonal pattern (e.g., top-left, then bottom-right) to distribute heat. Once cooled, use flush cutters to trim the excess leads if they protrude too far.
[H2] How to Install Surface Mount (SMT) Tact Switches
SMT switches are smaller and save board space but require a steady hand.
The "Tack and Flow" Method:
- Tin one pad: Melt a small pool of solder onto just one of the PCB pads.
- Position: Hold the switch with tweezers.
- Reflow: Heat the tinned pad while sliding the switch into place. Remove the heat and hold steady until the solder solidifies.
- Solder the rest: Now that the switch is anchored, solder the remaining legs normally.
For complex assemblies involving automated processes or rugged environments, proper footprint design is as critical as the soldering itself. You can read more in our industrial switch installation guide.
[H2] People Also Ask
Which way do you put a tact switch on a PCB?
Tactile switches are usually rectangular or have a specific pin layout that only fits one way. However, for square 4-pin switches, the pins are usually connected in parallel rows. Orient the switch so the pins bridge the gap in your circuit trace, effectively connecting the left side to the right side when pressed.
What temperature should you solder a tact switch?
Ideally, keep your soldering iron between 330°C and 350°C (626°F - 662°F). Apply heat for no longer than 3 seconds per pin. Excessive heat can melt the internal plastic plunger, causing the switch to lose its "click" or stick permanently.
Can you reuse a tactile switch after desoldering?
It is possible but not recommended. The heat required to desolder a switch often damages the internal plastic housing or the snap dome. Since tact switches are inexpensive, it is safer to install a fresh one to ensure reliability.
Common Installation Mistakes
Even experienced technicians make these errors when working with small electromechanical components.
- Cold Solder Joints: This happens when the pad wasn't heated enough. The solder looks dull and clumped rather than shiny and smooth. These joints will eventually crack under the mechanical stress of pressing the button.
- Flux Contamination: If you use too much liquid flux, it can wick inside the switch mechanism (especially non-sealed types). This leaves a sticky residue on the contact dome, causing the switch to fail intermittently.
- Floating Installation: If the switch body isn't flush with the PCB, the mechanical force of pressing the button is transferred entirely to the solder joints rather than the board, leading to ripped pads.
Frequently Asked Questions
Yes. While "no-clean" flux exists, it can still look messy and attract dust. Use a brush and Isopropyl Alcohol to clean around the switch, but be careful not to flood the switch button itself with solvent.
This is often due to internal heat damage. If you held the soldering iron on the pin too long, the plastic housing may have melted slightly, shifting the internal contact points so they no longer touch when pressed.
Yes, most through-hole tact switches have a 2.54mm pin pitch that fits standard breadboards. However, the pins are often short and springy, so they may pop out if not inserted fully.
Key Takeaways
- Check Orientation: Verify which pin pairs are connected before soldering to avoid shorting your circuit.
- Mind the Heat: Solder quickly (under 3 seconds) to prevent melting the switch's internal plastic components.
- Anchor First: Solder one pin, check alignment, and then finish the rest to ensure the switch sits flat.
- Clean Carefully: Remove flux residue without letting solvents seep inside the switch mechanism.
Conclusion
Installing a tact switch properly ensures that the user's primary interaction with your device feels crisp and responsive. By following the "anchor and solder" method and managing your heat input, you can avoid common pitfalls like cold joints or melted housings.
If you are scaling up your production or need components for harsh environments, check our guide on Industrial Switch Installation to ensure your assembly process meets professional standards.